Friday, September 30, 2011

31 Days of The Book of Proverbs


I've decided to take on the 31 Days of Change committment that I read about over at Nesting Place.  I was preparing this post with a completely different topic and then this idea just popped into my head.  It fits so nicely too.  You know, 31 chapters, 31 days.  I think God is trying to stretch me and grow me.  This whole exercise seems like perfect timing in my world.  I'm getting ready to travel for my work for the next six weeks, so I won't be able to work on my furniture makeovers and post about them like I've been doing.  Originally I thought I would talk about 31 days of discovering new blogs.  Which I still think would be a fun endeavor.  Maybe I'll still do the discovering, but just not write about it.


I'm excited to venture out and read what my fellow blogging friends write about during this time!  I hope you will come visit me during this journey as well.  Thanks for stopping by.  


Until tomorrow...........
(Day 1 will be up in the afternoon of 10/1/2011)  I got a little slow start to this, but I hope to get ahead for future postings.  So see you a little later today!


My 31 Days are all linked here one day at a time.
Day 1 - Chapter 1
Day 2 - Pursuit of Wisdom
Day 3 - Trusting in God
Day 4 - A Father's Instruction
Day 5 - Avoid Immorality
Day 7 - Treasure His Commands
Day 8 - Wisdom's Call
Day 9 - Wisdom's Invitation

Tuesday, September 27, 2011

Art Deco?

I'm not really sure if these two pieces are what's considered Art Deco.  But, I believe that's what they are called.  I was really excited when I picked these up for a great price.  But then I've been stumped as to what to do with them.  So I thought I'd put it out there for all my blogland friends to help me with some ideas.  I'm not sure how many will actually read this, but it's worth a try.  Without further ado.......here they are:


Lots of great details that will pop with the right treatment!


Just a little close up of some of the details.


This vanity has wood wheels.  How cool is that!

Should I try to save the design painted on the drawers?


I was thinking these might be my first Annie Sloan Chalk Paint projects, since I really don't want to sand and prime these babies!  What do you think?  Also, should I cut the back board off the vanity and leave it as is, or should I put a mirror there?  What do you think of the drawers with the design already painted on it?  Should I try to preserve that somehow?  The details on the trim and legs really need to be highlighted.  I'm not sure if just distressing will do the trick, or if I should try some other technique like goldleaf?  I'm sure there are other questions I should ask, but that's all I've got for now.

So put on your creative thinking caps and give me some feedback friends!  Thanks for your help.

Ready......Set.......GO!


Monday, September 26, 2011

Versatile Blogger Award


I want to thank Mandy over at The Project Queen for awarding me the Versatile Blogger Award!  As a fairly new blogger, I feel honored to be recognized by one of my blogging peers!  One of my favorite projects of Mandy's is this Vintage Blue Table Makeover.  Go check it out!

As a recipient of The Versatile Blogger Award, there are 3 rules to follow…
1.  Thank the person who awarded you.
2.  Tell 7 things about yourself that your readers may not know.
3.  Award 15 other bloggers with this award.

So, here I go........ (Thanks again Mandy!)

Seven Things About Me:

1.  I love Jesus and hope that my life brings Him glory!
2.  Both my husband and myself are native Floridians and have lived in Jacksonville all of our lives.  
3.  We have three grown sons, two of which are married.  So now we have a couple of daughters too!
4.  We have two grandsons ages 1 year and 2 1/2 years.  Guess our girls just come with marriage.
5.  I travel for my "real" job mostly in the Fall.  I'll be headed to Boulder, CO soon!
6.  I hope to replace above "real" job with selling my redone furniture and home decor.
7.  I'm not a very good housekeeper, which drives me crazy about myself.

Now for the 15 bloggers I wish to bestow this award too:

1.   Kim@A Brush of Whimsy
2.    Donna@Art is Beauty
3.    Rita@Curbside Creations
5.    Michael & Keeley@European Paint Finishes
6.    Courtney@French Country Cottage
7.    Donna@Funky Junk Interiors
10.  Lindsay@Living with Lindsay
11.  Lori@Lori...Lovin' Life
13.  Lisa@Recaptured Charm
14.  Korrie@Red Hen Home
15.  Debbie@Twice Nice

Congratulations to you all for the Versatile Blogger Award!  I hope you feel honored as I did.  If you haven't visited some of these great blogs, go take a look today!


Friday, September 23, 2011

The Beast

You may remember the peek at this buffet at the end of my last furniture makeover on a coffee table.  Here it is again in case you missed it.


I think I will name this piece, "The Beast"!  It tried to beat me, but I finally overcame!  I learned many lessons through the process of overcoming this beast.  Some of those lessons involved persevering and patience.  Some were more technical.  Like, be sure you sand and sand and sand when planning on staining.  And when you think you've sanded enough........sand some more.  This is the first time I've attempted staining.  So get ready for a really horrifying sight!  Here's my first attempt at staining the top of this guy. (Yes, this one is a guy).


Not quite the look I was going for.

The next frustration came when I was trying to put all the hardware back on.  For some reason the doors wouldn't close and some of the handles kept falling out of the side pieces.  I still don't understand why this happened.  My wonderful son, Peter, gave me a helping hand and got it all back together again.  I never could have gotten this done without him!  I didn't get any pictures of this process, but you get the idea.

I've also learned that I need to draw the line at how much money to put into a piece that I'm selling.  I was originally going to put knobs where the key holes are, because there were no keys and one of the locks was broken.  I ended up spending $45 to get keys made and get the post repaired on the broken lock.  I'm just not sure it was a cost effective move on my part.  What do you think?

Ok, enough of my rambling.  Let me introduce you to "The Beast"..............


I guess he's not so much of a beast now.  


Much better.  Don't you think?


Do you think the keys were worth it?


If I spray paint the key, do you think the paint will stay on? 
 I wasn't sure with the locking and unlocking.


I'm glad I didn't give up.  I think my beast turned out to be a pretty handsome guy.  

My next challange is some modern looking furniture that a friend wants me to shabby up.  Is that a term?  Probably not, but that's what I'm calling it.  Anyway, thanks so much for stopping by!  I hope you enjoyed your visit!

Monday, September 19, 2011

A Look Back at the Begining

Now that I have this whole blogging thing a little more figured out, I thought I'd repost the piece that I started it all with back in July of this year (2011).  I know more about the great sharing that goes on through linky parties and wanted a chance to share this one with more people than I did the first go round. 

Although I've been painting my own funiture and even my cabinets over the years, I never really researched the proper way to do it until recently.  I got my first real "lesson" in painting furniture from an ebook I purchased from Mandie over at Altar'd Designs.  She gave lots of great tips!  Since then I have found some very helpful blogs with tutorials.  My number one "go to" blog would have to be Miss Mustard Seed!  I am so thankful to her for sharing her wealth of knowledge so generously.  There are tons of other blogs out there with some great tutorials on some techniques I still haven't tried.  

Anyway, that's a little bit about my blogging and furniture transformation journey.  So, here's the piece I started it all with........

This is the before of course!  I took this picture at the estate sale where I purchased the desk.


The after is SO much better!


I did this little crackle look using Elmer's glue.


I was pleased with the final result.

Thank you so much for stopping by.  Please let me know what you think.  I look forward to "meeting" many more of you through blogland!

Blessings!

Friday, September 16, 2011

Feeling Creative

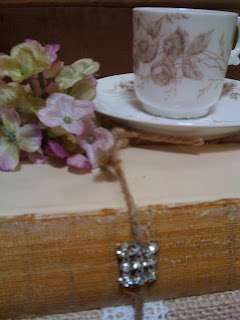
I just didn't feel like working out in the heat on my furniture project today, so I decided to get creative with some book bundles.  I've seen these out there in blogland in a few places.  So, this is by no means my original idea.  Anyway, I had fun putting these together.  I buy my old books on the last day of an estate sale with one of my favorite companies.  They have this deal in the last part of the day where you can fill a plastic grocery bag for $1.  My bag is usually busting at the seams!  Here's where my creativeness flowed today.........


I'll get back out to the garage tomorrow.  Thanks for your visit.  Come back often!

Linking up to:


Knick of Time Interiors - Knick of Time Tuesday


Thursday, September 15, 2011

Fall Inspired!

Living in Florida, it's hard to think about decorating for Fall yet.  The high here today is supposed to be 96 degrees.  Ugh!  However, through my perusals in blogland, I have been inspired.  Debra over at Common Ground has all kinds of beautiful vignettes with her love for orange showing through.  She's also hosting a linky party in honor of Fall.  I've got her button on my sidebar.  Shannon over at Cozy Home Scenes has outdone herself with a beautifully decorated mantle!  There are many more that I looked at, but alas I forgot to bookmark them.

Without further ado, here is my very little piece of Fall for now.

It's not realy fancy, but it makes me feel good.


I love roosters.  Can you tell?

I got this little tray at an auction for $7.50.  I love it!

I need to get a runner, or something to spice it up some more.  Any suggestions?  Thanks so much for stopping by today!

Thursday, September 8, 2011

Coffee Table Makeover

Well, here's another one of those pieces that just kind of "spoke to me" as I began to work on it.  I had one idea in mind, and then it just took on a life of it's own as I went.  I found this gem at an estate sale on the last day in the afternoon.  This one particular company in my area practically gives things away at that point in the day.   So needless to say I got a steal of a deal!  Anyway, here is a little peek at the before:

I really liked that this had a drawer.  And the turned legs of course.

I had a time making the top of this piece cooperate.  Although the table is solid wood, there was a formica layer on top.  I used Killz as recommended by others.  But I got a splotchy pattern that showed through when I put on the first layer of dark brown paint.  At that point I decided not to put on another layer of the brown.  I proceeded to lightly sand that layer and then added a dry brush layer of antique white.  Then I put a glaze made with the dark brown over the entire piece.

And here she is!

I kept the original hardware and just painted them.

Just a little detail

I am happy with the final result.

Here's a peek at my next project.


Thank you so much for stopping by.  Please come back often to check out what's new.

Blessings!  Jeanne